How to Install WordPress on Hostinger: Steps and Best Plan to Buy
How to install WordPress on Hostinger is a practical checkout-to-publish path: buy the right plan, connect a domain, run one click WordPress install in hPanel, turn on free SSL, then log in to wp-admin. You do not need SSH or manual database setup for a standard first site.
Most beginners fail this flow for plan reasons, not installer reasons. They buy a tier that is too small, skip renewal math, or publish before SSL and permalinks are set. The steps below keep setup and buying decisions in the same checklist.
The short answer: buy Hostinger Premium for most blogs and small business sites, use Business when staging or WooCommerce headroom matters, then install WordPress with the guided hPanel tool. Confirm promo and renewal on checkout before you start the installer.
Ready to begin? Open Hostinger WordPress hosting plans, pick your tier, then follow the install steps on this page beside your hPanel tab.
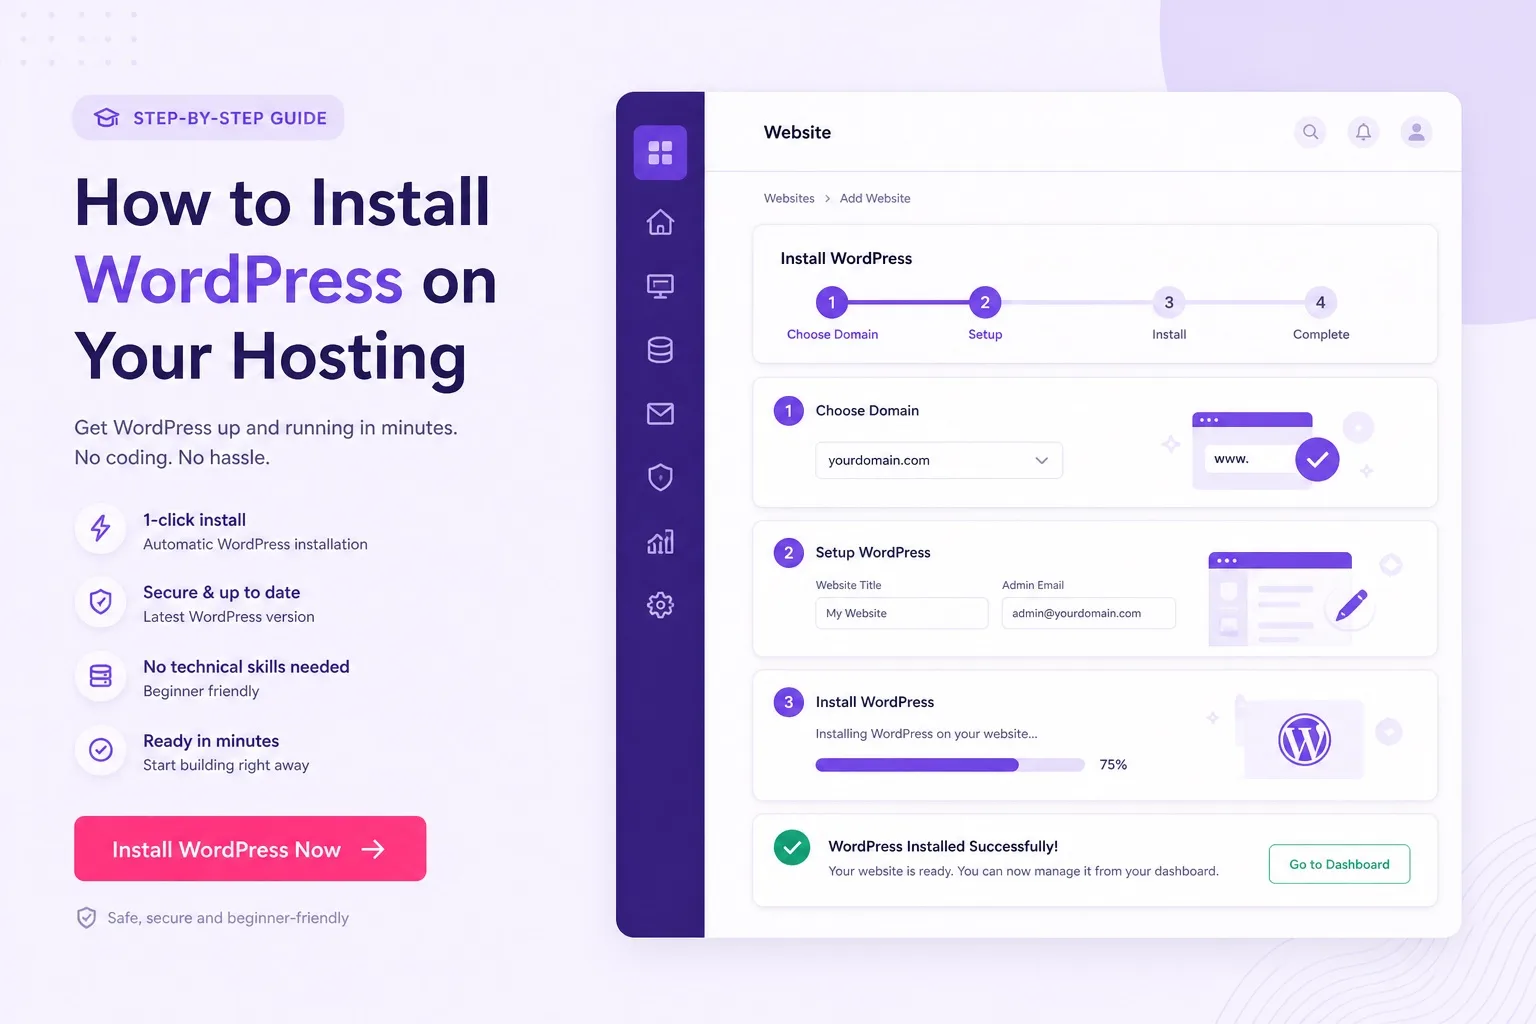
One click install is easy. Buying the right plan first prevents a mid project upgrade.
Buy the Right Hostinger Plan Before You Install
Install steps only work smoothly when the plan matches your site count and workload. Buying first, then installing, is the correct order for a clean WordPress launch on Hostinger.
Premium is the practical first buy for most people reading this guide. It supports multiple websites on common plan setups and usually unlocks free domain eligibility on qualifying annual terms. That fits blogs, portfolios, and small business brochure sites.
Business is the better buy when you need staging, stronger backup behavior, or WooCommerce headroom soon. Do not buy Business only because the name sounds advanced. Buy it when you can name the feature you will use in the next 90 days.
Entry Single style plans can work for one simple site. They get outgrown quickly if you add client demos or a second brand site. Our WordPress hosting for beginners guide maps each tier to first site reality.
Before payment, write promo price and renewal price for the same billing term. A cheap install path still fails if year two pricing surprises you. Check live WordPress hosting plans and confirm both numbers on the order summary.
Our web hosting deals checklist covers promo vs renewal, free SSL, and free domain rules if you are buying during a sale week.
What You Need Before One Click WordPress Install
You need an active Hostinger hosting account, access to hPanel, and either a domain you own or eligibility to claim a free domain on a qualifying term. Email access for the domain registrar helps if nameservers must change.
Decide your site title and admin username before the installer opens. Avoid using admin as the username. Use a strong unique password and store it in a password manager before you click finish.
Know whether WordPress will live on the root domain or a subdirectory. Most first sites install on the root so example.com loads WordPress directly. Subdirectory installs are for secondary projects on the same domain.
Also decide whether email will live on the same Hostinger account. Creating mailboxes after WordPress install is fine, but knowing the plan includes enough mailboxes prevents a mid launch surprise for business sites.
Experience note: finish domain connection intent before you rush the installer. Installing on a temporary URL then moving later creates redirect and search confusion you can avoid with ten more minutes of domain setup.
If you still need to purchase hosting, start WordPress hosting on Hostinger now, then return to this section with hPanel open.
Step 1: Log In to hPanel and Open Websites
Log in to hPanel for the hosting plan you just bought. Find the websites area where you add a domain or manage an existing site. This is the control center for install, SSL, and email.
If you claimed a free domain during checkout, complete domain setup prompts in the same session when possible. Waiting days can create avoidable DNS tickets and delayed SSL.
If your domain is at another registrar, point nameservers to the values Hostinger shows for your account. Keep the registrar tab open until Hostinger confirms the domain is connected.
DNS changes are not always instant. Propagation can take minutes or longer depending on prior DNS settings. Do not panic if the domain is not live in sixty seconds. Check again after a short wait.
While you wait, write your intended site title and first page outline so the install session stays productive. Small prep like that turns idle DNS time into launch progress.
Expertise tip: screenshot nameserver values before you change them. If something breaks, you can compare what you entered versus what Hostinger requested. Continue with hPanel WordPress hosting tools once the domain status looks connected.
Step 2: Connect or Add Your Domain
Add the domain you will use for WordPress. Prefer the final brand domain before you publish content. Temporary hostnames are fine for private testing only.
Free domain eligibility usually sits on qualifying annual Premium or Business terms, not every short bill. Confirm the free domain line on checkout if that extra is part of your budget. Our web hosting free domain and SSL guide explains what you actually get.
After the domain is attached, verify it resolves to Hostinger before you expect WordPress URLs to load publicly. A connected status in hPanel is the signal you want.
Trust tip: do not buy a random unused domain only because it was free if you already own the brand domain you will keep. Free is only valuable when you will use the name.
When domain connection is done, you are ready for one click WordPress install. Keep hPanel and this guide side by side. Open live Hostinger plans anytime if you still need to buy WordPress hosting for a second site on Premium or Business.
Step 3: Run One Click WordPress Install
In hPanel, open the WordPress installer for your domain. Choose the domain or subdomain target, set site title, admin username, and a strong password, then start the install.
One click WordPress install creates the database and files for you. You should not need to create MySQL users manually for a standard Hostinger WordPress hosting setup. Wait for the success screen before you leave the tab.
Language and site settings can be adjusted later in wp-admin. Focus on correct domain target and secure admin credentials during this step. Soft mistakes here cause login confusion later.
If you manage client sites, write the install date and plan name in your project notes. That record helps when someone asks which Hostinger account holds the live WordPress files six months later.
Experience note: copy the wp-admin URL from the success screen into your password manager entry. Future you will thank present you when you cannot remember the exact login path.
If the installer is missing, confirm you are inside the correct hosting plan and that WordPress tools are enabled for that product. WordPress first buyers should stay on managed WordPress hosting style plans rather than fighting a mismatched product.
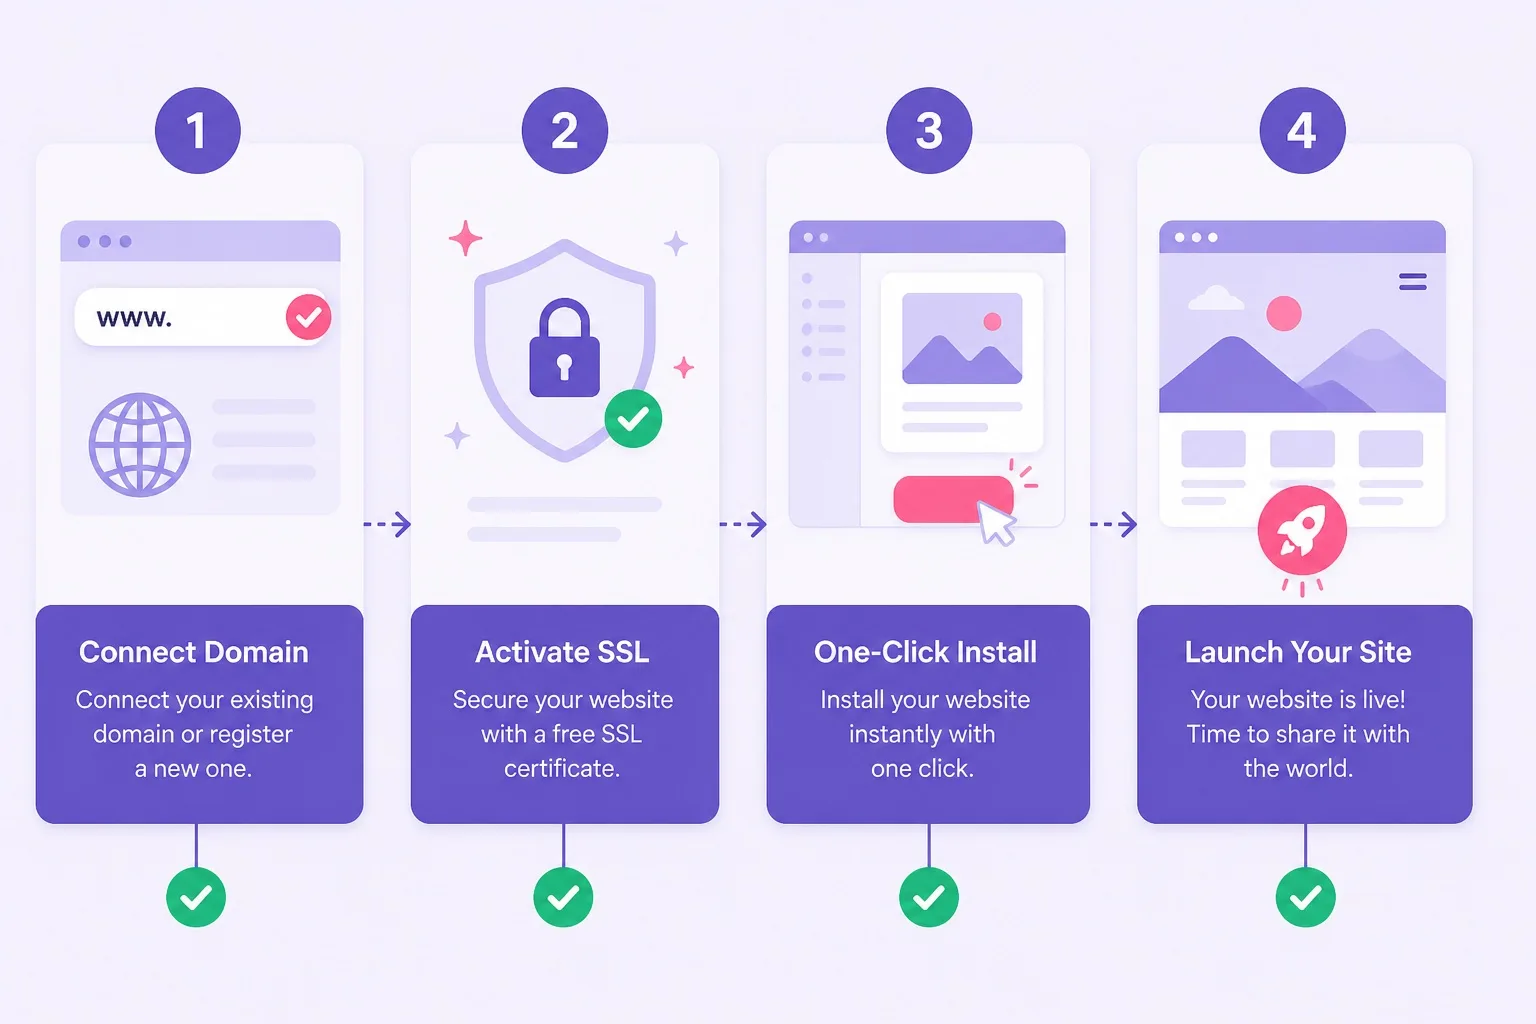
Domain first, installer second, SSL third. That order prevents most beginner loops.
Step 4: Turn On Free SSL and Check HTTPS
After WordPress installs, turn on free SSL for the domain in hPanel. Wait until the certificate shows active, then load your site with https in the browser.
Mixed content warnings usually mean images or scripts still call http URLs. Fix those in WordPress settings or with a search replace after migration. For a fresh install, set the site URL to https early.
Free SSL is common across Hostinger WordPress hosting plans. Still confirm it on your account because region and product labels can vary. Do not publish traffic until the padlock behavior looks correct.
If SSL stays pending, recheck DNS. Certificates often wait until the domain points correctly. Patience beats forcing insecure publish. A short wait here is better than sharing an http link that browsers warn against.
When HTTPS loads cleanly, continue to wp-admin setup. If you are still choosing a tier for a new install, compare Hostinger Premium plan and Business features on live checkout first.
Step 5: First Login and Essential WordPress Setup
Log in to wp-admin with the credentials you set during install. Update WordPress core if an update notice appears, then set permalinks to a post name style structure for cleaner URLs.
Pick a lightweight theme for a first launch. Avoid stacking five page builders on day one. Install only essential plugins: security basics, a form tool if needed, and a cache or performance plugin that matches Hostinger guidance.
Create a Home page and an About page so the site is not an empty Hello World install. Delete sample content you will not use. Empty default sites look unfinished to visitors and to you.
Turn off public search engine discouragement only when you are ready to be found. Many owners leave the discourage search engines box checked during private setup, then forget it. Uncheck it when the first real pages are ready.
Create a second admin aware workflow: store backups of important settings, and know where Hostinger backups live in hPanel. Business buyers who need staging should create a staging copy before heavy plugin experiments.
For blogging speed after install, our fastest WordPress hosting for blogging guide shows which plan habits keep pages light. Pair that with a clean theme from day one.
When the first pages are live, you have completed how to install WordPress on Hostinger for a standard site. Keep improving content while the hosting plan stays matched to growth. Claim ongoing tools inside your Hostinger WordPress hosting account as you expand.
Best Plan to Buy for Most Installs: Premium
Premium is the best plan to buy for most how to install WordPress on Hostinger readers. It balances price, multiple websites, and daily performance better than entry Single for anyone who may add a second site.
Free domain eligibility on qualifying annual Premium terms is a practical launch bonus when you need a new domain. Confirm eligibility on the order summary before you count it as savings.
Premium also leaves room for a staging upgrade path later without forcing you into cloud or VPS on day one. Most blogs and local business sites never need more than Premium in year one.
If you write affiliate content or niche reviews, Premium still fits the first install for most single site launches. Upgrade later when traffic or plugin weight proves you need more headroom.
Our best Hostinger WordPress hosting plans post compares tiers in more detail if you want a full feature map before payment.
Buy Hostinger Premium when your install goal is a real WordPress blog or business site you will keep, not a throwaway test that dies in a week.
When to Buy Business Instead of Premium
Buy Business when staging is part of your workflow. Testing plugin and theme updates on staging before the live site changes is the clearest Business value for stores and agencies.
Buy Business when WooCommerce or heavier traffic patterns are near term plans. Headroom and backup behavior matter more once checkout pages and product images enter the stack.
Do not buy Business only to feel safer. If your site is a simple brochure and you will not use staging, Premium usually remains the smarter install plan. Our Hostinger Premium vs Business guide helps that call.
Confirm live Business features on checkout because names and limits can change by region. Then install WordPress the same way: domain, one click install, SSL, wp-admin essentials.
Ready for store or staging needs? Compare Hostinger Business plan pricing and renewals, then run the installer on your connected domain.
Common Install Mistakes to Avoid
Installing on a temporary URL then switching domains without redirects is a common mistake. Connect the real domain first when you can.
Using admin as the username and a weak password is another avoidable error. Secure credentials during install take thirty seconds and prevent easy break in attempts later.
Publishing before SSL is active sends mixed signals to visitors and tools. Wait for HTTPS. Skipping permalinks leaves ugly default URLs that you will want to change after content exists.
Installing five heavy plugins before the first page is written also slows new owners down. Get the site online with a lean stack, then add tools when a real task needs them.
Buying Single when you already need three WordPress installs creates an early upgrade. Match plan limits before the first installer run. Compare WordPress hosting plans with your real site count.
Ignoring renewal price while celebrating a fast install is the trust failure. Setup success does not cancel year two billing reality. Our Hostinger WordPress hosting review helps you sanity check Hostinger beyond the installer screen.
Install Checklist Before You Call the Site Live
Run this checklist before you share the site publicly. It closes the gap between installed and ready.
- Hosting plan matches site count and workload
- Domain connected and resolving to Hostinger
- WordPress installed on the correct domain target
- Admin username is not admin and password is strong
- Free SSL active and https loads without warnings
- Permalinks set to a clean post name structure
- Sample content removed and first real pages published
- Promo and renewal prices written down for your term
Most beginners who finish that list stop looping through hPanel in confusion. They either publish or they know exactly which step is still pending.
Ready to install on a fresh account? Open WordPress hosting checkout, buy Premium or Business, then complete steps 1 to 5 on this page. Visit the wordpress hosting homepage if you want more plan comparisons first.
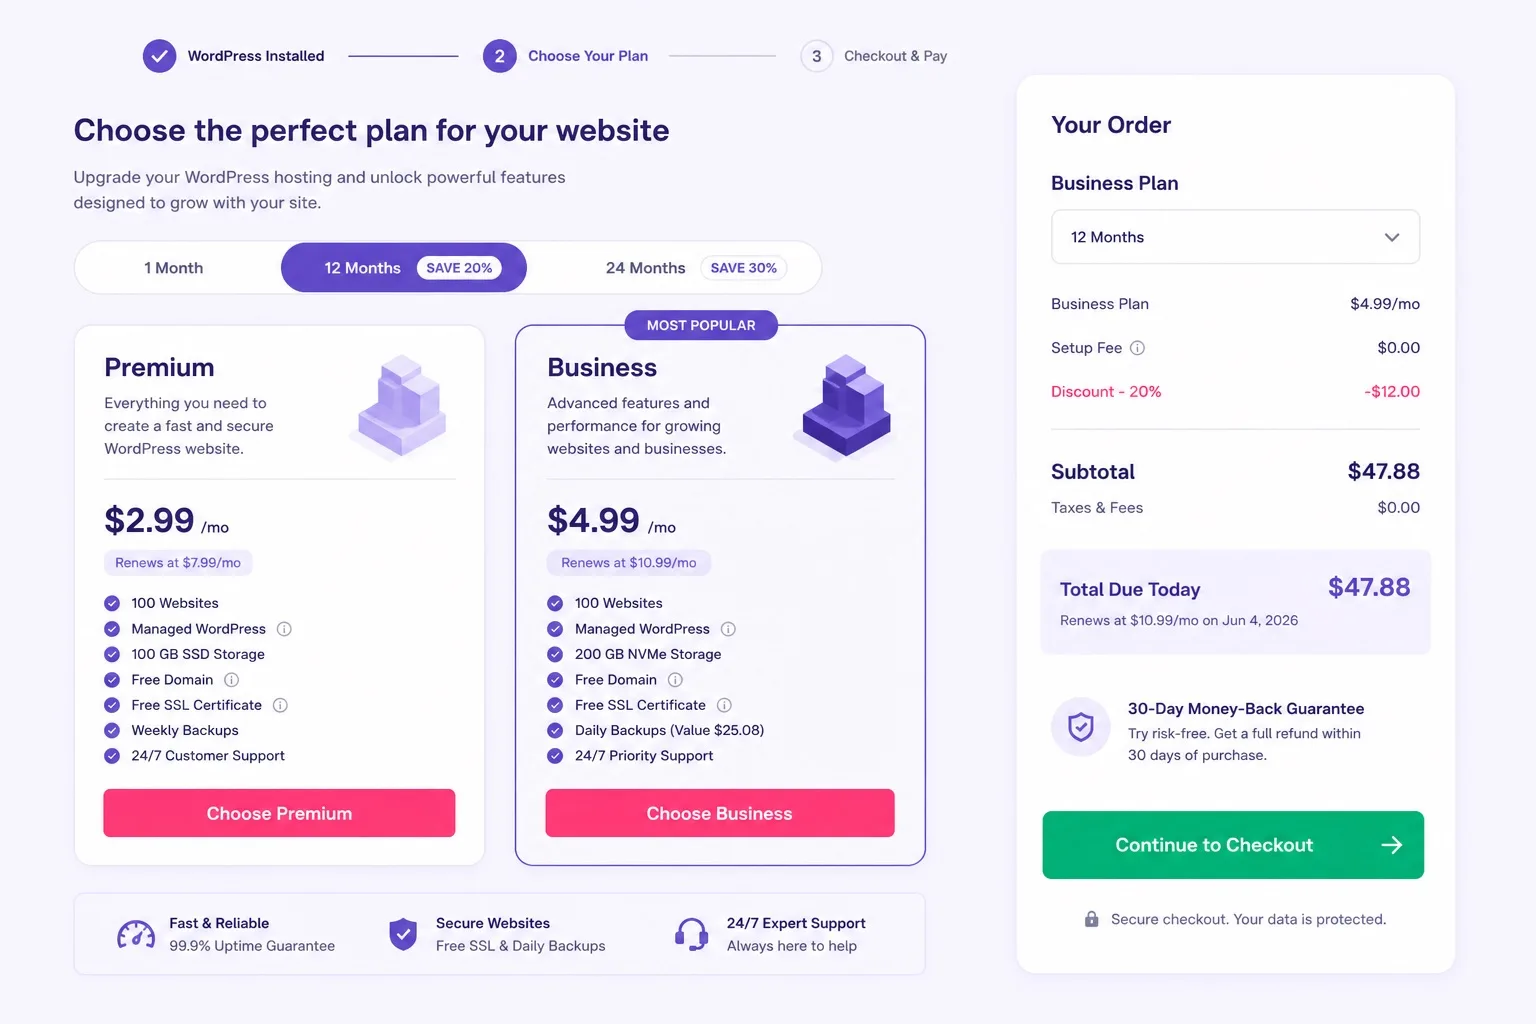
Confirm live pricing and renewal rates on checkout. Promo rules can change by region and billing term.
How to Install WordPress on Hostinger FAQ
These are the questions beginners ask most before and after install. Skim the ones that match your stage. More setup posts live on our wordpress hosting blog.
Can beginners install WordPress on Hostinger?
Yes. Hostinger hPanel includes one click WordPress install. Connect or register a domain, run the installer, turn on SSL, then log in to wp-admin. Most beginners finish the first install in one sitting.
Which Hostinger plan should I buy before installing WordPress?
Buy Premium for most blogs and small business sites that may run more than one website. Buy Business when you need staging, stronger backups, or WooCommerce headroom. Confirm live plan features and renewal price on checkout.
Do I need a domain before I install WordPress on Hostinger?
You can start with a temporary Hostinger URL, but a real domain is better before you publish. Free domain eligibility usually applies on qualifying annual Premium or Business terms. Confirm eligibility on the order summary.
Is SSL free when I install WordPress on Hostinger?
Yes on common Hostinger WordPress hosting plans. Free SSL should appear in hPanel after domain connection. Turn it on before you share the site publicly so browsers show a secure connection.
How long does WordPress install take on Hostinger?
The one click installer usually finishes in a few minutes after domain DNS is ready. DNS propagation can take longer if you just pointed nameservers. Wait for the domain to resolve before you expect the live URL to load cleanly.
Can I install WordPress more than once on the same Hostinger plan?
Yes if your plan allows multiple websites. Premium and Business are the usual picks when you need more than one WordPress install. Entry Single style limits often cover one main site only.
What should I do right after WordPress installs?
Log in to wp-admin, set permalinks, pick a theme, install only essential plugins, create a strong admin password, and confirm SSL redirects. Then publish a first page so the site is not an empty default install.
Should I buy Hostinger before or after learning WordPress?
Buy hosting when you are ready to publish a real site in the next weeks. Learning WordPress on a live Hostinger install is faster than watching tutorials alone because you practice domain, SSL, and wp-admin on the real stack.
Final Verdict: Install Steps and Best Plan
How to install WordPress on Hostinger is straightforward when you buy the right plan first: connect domain, run one click install, enable SSL, then finish wp-admin essentials. The installer is not the hard part. Plan fit and renewal honesty are.
For most blogs and small business sites, Hostinger Premium is the best plan to buy before you install. Choose Business when staging or store load is a near term need.
Keep E-E-A-T habits in this flow: real hPanel steps, accurate plan advice, related internal guides, and no fake forever prices. That is how an install guide stays trustworthy after the thank you page.
Ready to install today? Compare tiers and start Hostinger WordPress hosting while promo pricing remains active. Confirm plan name, billing term, and renewal figure before you pay, then follow steps 1 to 5 above. See cheap WordPress hosting Hostinger details if budget is your main filter.
Still comparing options? Visit the best WordPress hosting homepage for more guides, then return to checkout when your plan choice is clear. Launch WordPress website hosting only after domain and SSL intent are decided.
Final trust check: right plan, connected domain, successful install, active SSL, clean first pages. If all five pass, your Hostinger WordPress site is ready to grow. Keep this checklist for the next site you install on the same Premium or Business account.